 Billing Extension 37
 Commission Manager 3
 Mercury 8
 Payments Bundle 2


Modules' installation guide
Download
Visit modules page (make sure you are logged in) and click on the module you have just purchased. Go to Manage. Select the appropriate PHP version and press Download button. 
Upload
Uncompress the downloaded Zip file and upload all files to the root directory of your WHMCS with an FTP client. For more details take a look at the animation below.

If your MySQL server is not running on the default port (3306), open configuration.php and add the following string $db_port = '{YOUR_PORT}'; (don't forget to specify your port). Once done focus on the value of $db_host. If the value is localhost, change it to 127.0.0.1.
Activate
In your WHMCS back-end navigate to Setup > Addon Modules page. Find the module in the list and press Activate to start the installation. If you cannot access this page because of a blank page or fatal errors please read our Troubleshooting Blank Page / Oops Error Message guide.
After the installation is complete press Configure button to insert your license key and grant access permissions. Once done click Save Changes.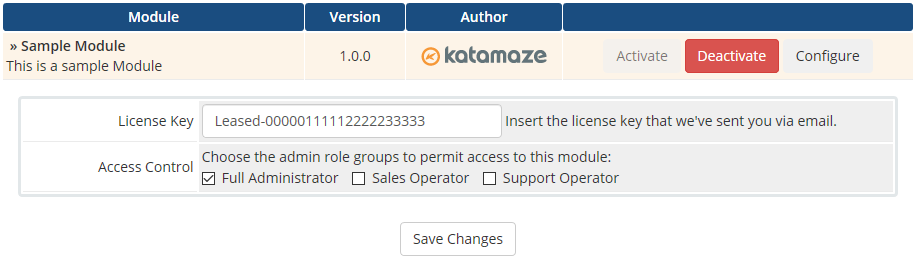
Further steps
Depending on the module you purchased, there could be further steps to complete the installation.
- Billing Extension
- Payments Bundle
- For Mercury visit Addons > Mercury > Settings
There's something more
Modules come with our proprietary technologies SorTables, HereLang and MagicInput. Learn how to use them for a better user-experience.
Visit our Lab to get more information and join our best development tool! You can ask new features, report bugs and rate existing projects.
Comments (0)